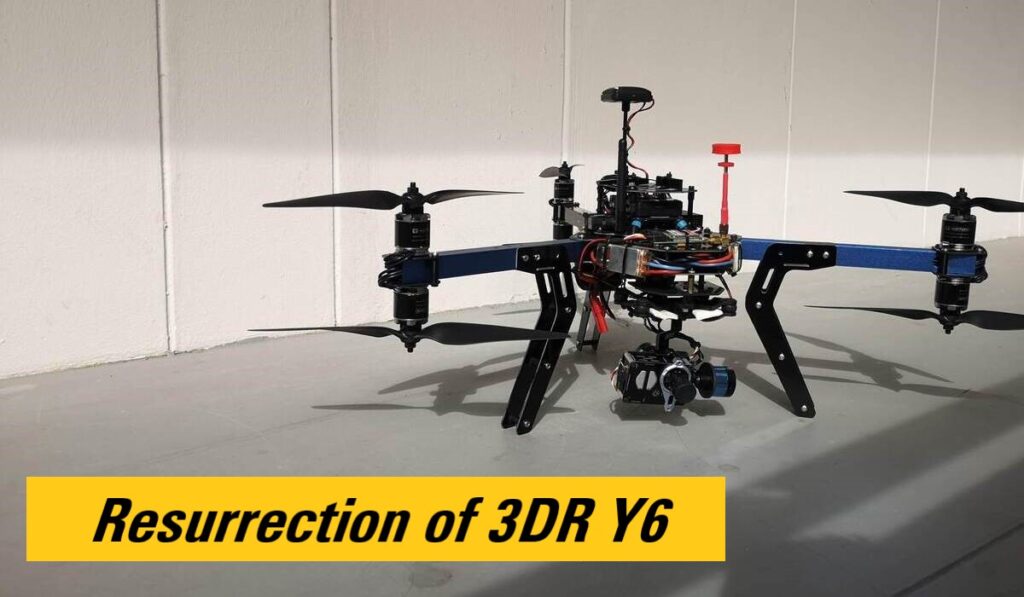
This article is going to talk about a recent mini project I have undertaken to make my 2014 coaxial hexacopter 3DR Y6 flight worthy again. I will also explain some technical details on the setup and the components used in the 3DR Y6.
This “multirotor” (this is what this class of aircraft was called back then before what is commonly referred as a drone now) was designed and sold by 3D robotics in the early years (pre-2015). Along with other kits such as X8 Coaxial Octo and their RTF Iris, these were their mainstream products before the 3DR Solo came along. We knew what happened to Solo and 3DR eventually and I am not going to talk about that here
Coming back to present time where the mainstream for this hobby is FPV & racing drones. I thought it would be interesting to pull the old bird out of storage and let her soar again!
Air Frame
Almost all of the components are “original ” when it was first installed back in 2015, some of the technologies used are already obsolete by now. Allow me to run through some key components starting with the frame.
I bought a DIY kit version (frame only) from 3DR, there was a complete kit version (FC, ESC, motors, etc. included) being sold as well. But since I was looking to customise my Y6, I chose to go with the frame only kit version.
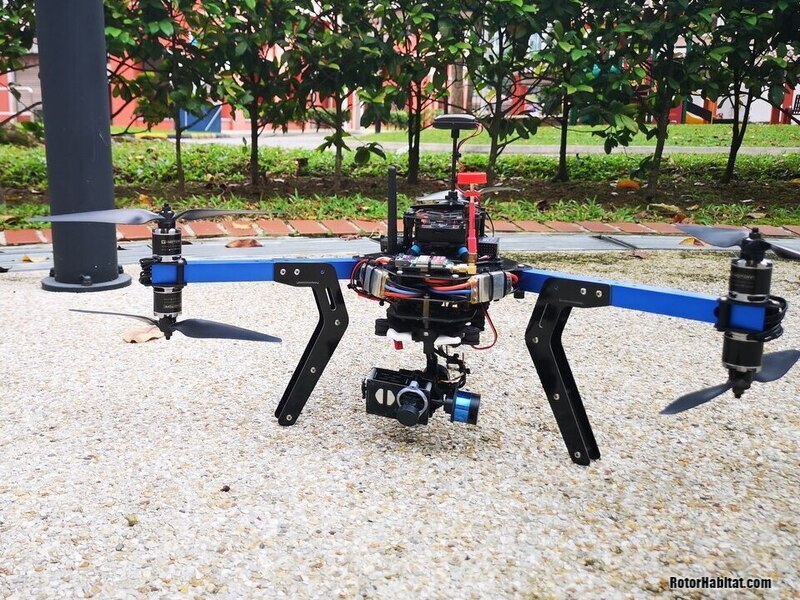
The 3DR Y6 frame is made of laser cut glass-reinforced fibre plates with aluminum arms, this gives it a good balance between rigidity & weight when compared with common frames with resin arms (DJI flamewheel, some of you will know what this is). It is also cheaper than getting a full carbon fibre Y6 frame.
The effective frame size of the 3DR Y6 is 560mm, which is 2 times the distance of the motor’s centre to the frame centre (i.e the intersection of all the 3 arms’ axis toward the frame). This differs from a traditional flat configuration where it is to measure motor to motor centre distance of opposite arms.
Flat Hex vs Y6 Coaxial
Both are hexacopter since they have 6 rotors. The flat hexacopter has 6 arms with a motor each. while the Y6 essentially is a tricopter (minus the tail servo) with 2 motors spinning coaxially on each arm.
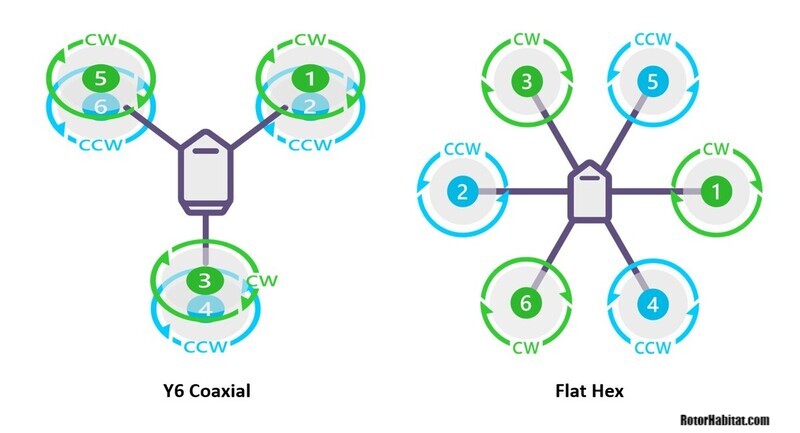
So what are their differences between flat and coaxial configuration? Some pilots may argue that a flat copter will be much more efficient than a coaxial counterpart. But in fact I would say it is both right and wrong.
- Yes: If we are comparing both configurations using the same size props and motors then the flat copter will give better efficiency. However, the flat copter will have to use a bigger size frame as compared to a coaxial copter at that given prop size. Take a look at the 3DR Y6 for instance, it can use 11 inches props safety. To use the same prop on a flat copter you will need a frame size 600mm to let the props clear each other!
- No: With reference to above argument, if we are comparing efficiency at a given frame size; let’s say 560mm, then the winner will be the coaxial copter. The coaxial copter will be better to spin bigger props at a slower rpm, thus yielding better efficiency. Furthermore, the disk area (total surface area of all spinning props) is about 50% more for a coaxial copter when compared to a flat copter. The higher the disc area the more efficient the multirotor is.
Other advantages for a Y6 multirotor:
- Having half the number of arms compared to a hex, your camera can better achieve a better view cleared of props. This means no arms at the forward section of the multirotor. This is especially true if you mount a camera gimbal, there is a high chance that you will capture your spinning props in your video frame when pitching forward.
- Better redundancy to single motor/ESC failure. With 2 motors/props on every arm, as long as a single motor can take up the full load when the other motor fails (i.e you need less than 50% throttle hover capability). Furthermore, there is no reduction in disk area when one motor fails.
- Smaller size frame plus it is foldable (at least for the 3DR Y6), better portability to travel with the multirotor.
- This might be subjective; a Y6 looks much cooler!
Drive
It is a joy (at least for myself) to DIY multirotor rather than getting a RTF off the shelf, because of the ability to match, experiment then finally integrate different components to meet your desired performance or characteristic for your multirotor.
To make the selection process easier, I make use of the Electric Drive Simulator from eCalc. It’s yearly subscription is reasonable and if you are really serious into building your own multicopter, you shouldn’t miss out on this fantastic tool.
There is a free version that you can use but it has a limited selection of ESCs, Motors, Batteries, etc. from its database. In my opinion, the final objective when doing drive’s component selection is to achieved maximum power efficiency the following:
- Max prop size on the any chosen frame
- Ensuring selected motors can drive the props at the given voltage (3s, 4s or 6s etc.)
- Ensuring ESC are properly sized based on your props, motors & batt voltages selections
- Maximising your flight/hovering time by simulating by different combinations above and your battery capacity (mAh)
You will realise there will be an efficiency or max flight time limit for a given setup against increasing the capacity of the battery. At some point, carrying a bigger battery won’t increase your flying time but in fact will affect the controllability of your multirotor. Then the only way to push up the limits will be by using higher batt voltage or spinning bigger props.
After many interactions of calculations for my 3DR Y6, I have settled for the following drive components:
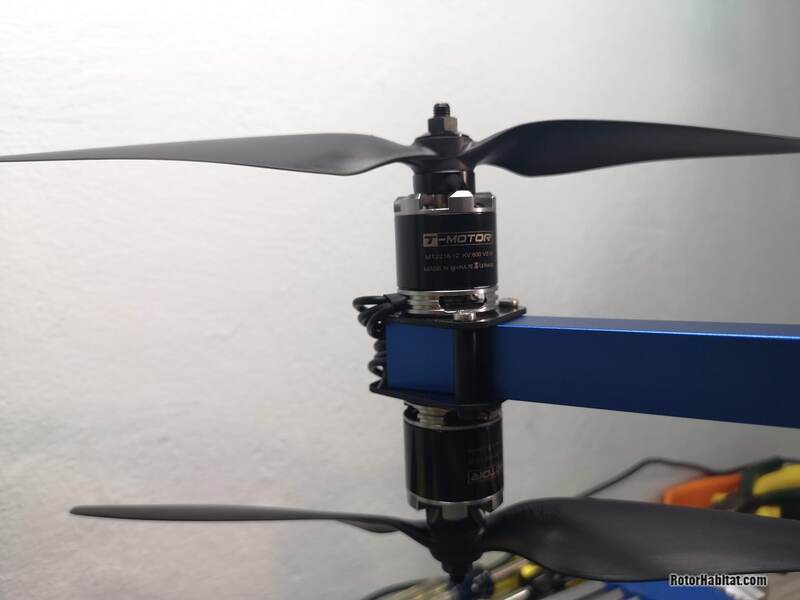
- Motors: T-Motor MT2216 800KV
- ESCs: F30A from Hobbyking, flashed with SimonK firmware (no one uses this anymore, BL_Heli is the current firmware now)
- Propellers: 10 inches, with the option to use 11 inches on the lower motors
- Battery: 4s 6000mAh
Fight Controller & TX
The brain inside the 3DR Y6 is the Pixhawk 1 sold by 3DR in 2015. It was the period when the APM2.6 was being phased out and replaced by a newer hardware – The Pixhawk. I remembered the latest Arducopter firmware was no later than Version 3.2.1 when my Pixhawk was first used, the capabilities and features back then were nowhere what we have in the current version of Arducopter (Version 4.0.7 at the point of writing).
My Pixhawk is using the infamous REV A version of STM32F427 chip; therefore there is a hardware bug that limits the flash memory to 1 MB. I couldn’t install the full version of the latest Arducopter firmware which is over 1MB in size already. Thankfully, the developers do compile 1MB versions for every release of new firmware.
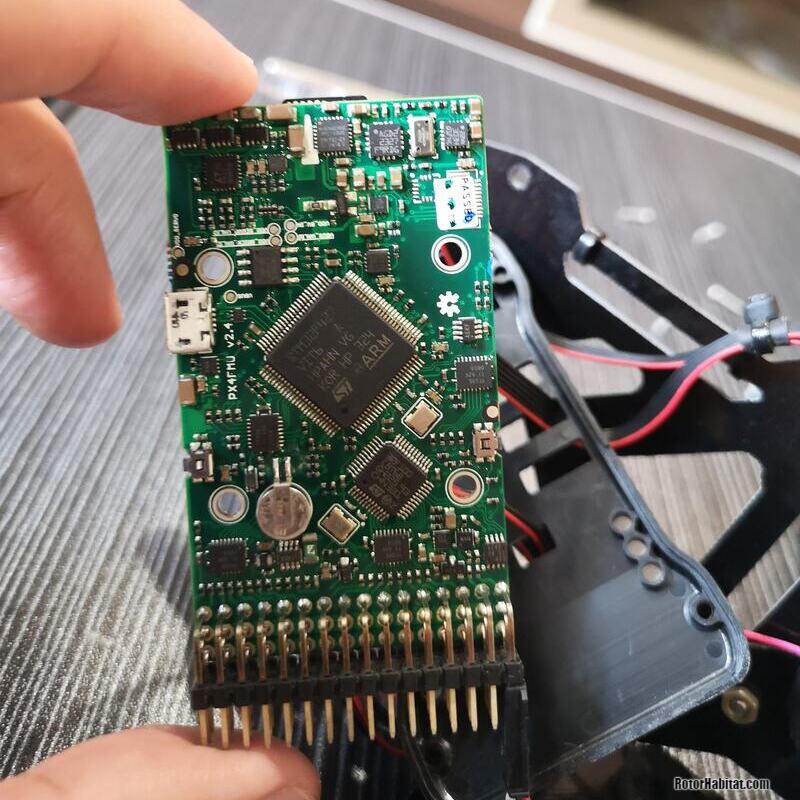
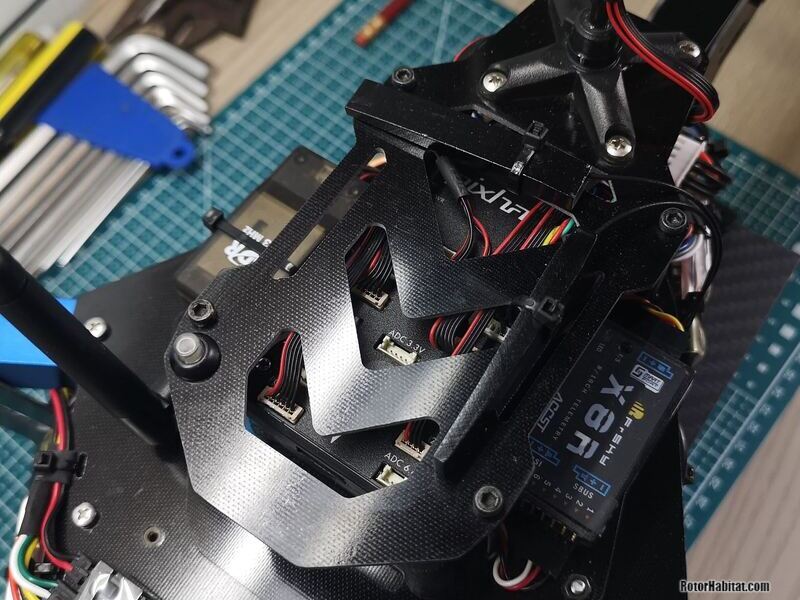
For the complete list of 1MB firmware exclusion, you can refer to the Ardupilot documentation. Luckily for me, the FrSky telemetry protocol is still included as this is the only upgrade I am going to do; by using a OpenTX radio to receive telemetry data from the FC. Previously, I was using a Futaba T10J TX and had to bring a laptop along to the field in order to receive telemetry data!
See my review and thoughts of the Frsky Taranis X9D+ 2019 SE
The biggest investment (at least for now) I made for my “re-entry’” into this hobby is the purchase of the Frsky Taranis X9D+ 2019 SE radio. It was kind of an impulse buy as I wanted to make use of the FrSky telemetry protocol to display flight data directly to the screen of the transmitter.
See my article: Setting up FrSky Telemetry Protocol – Yaapu Script & FlightDeck (Coming Soon)
Camera System
The 3DR Y6 was designed and intended to be used as an aerial camera platform. Therefore I am mounting a converted “GoPro form factor” Mobius Action Camera onto a Tarot T2D 2 axis gimbal. Using a custom cable, I am getting live video from the Mobius via USB port and feeding it into a single band ImmersionRC 600mW video transmitter. Live video feed from action cameras generally have too much latency for fast paced FPV racing. However, it is good enough for the 3DR Y6 as it will be flying slow and non-aggressively most of the time.
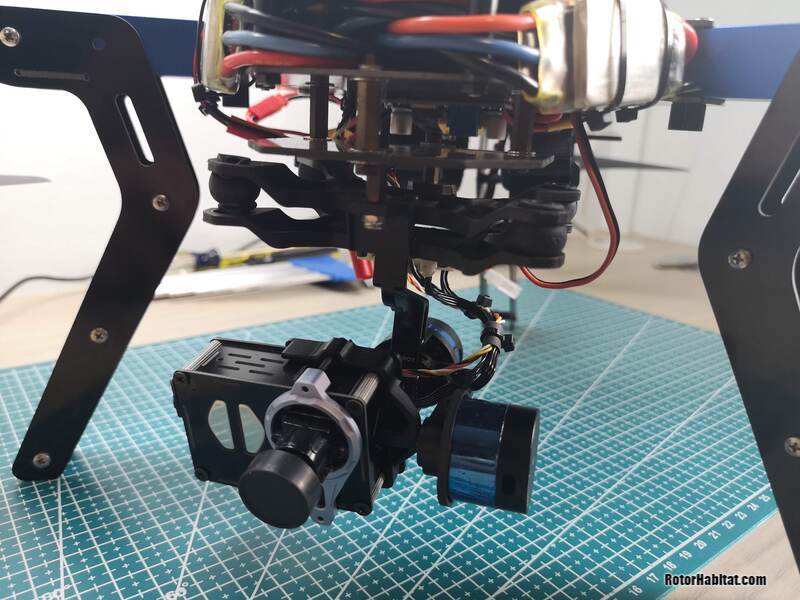
The camera gimbal’s pitch function is connected to the Pixhawk to allow the autopilot to control the camera’s pitch angle. This gives the 3DR Y6 autonomous ability to point the camera at a region-of-interest (ROI) when executing a mission or a command from the Ground Control Station (GCS). Besides that, I am also able to manually control the camera’s angle via the TX’s knob (Potentiometer). Allowing me to perform any videography shots if I desire!
Power Configuration
I was contemplating whether to use a single or double battery setup. One main flight battery and another for the video transmitter and gimbal or just a single battery powering everything.
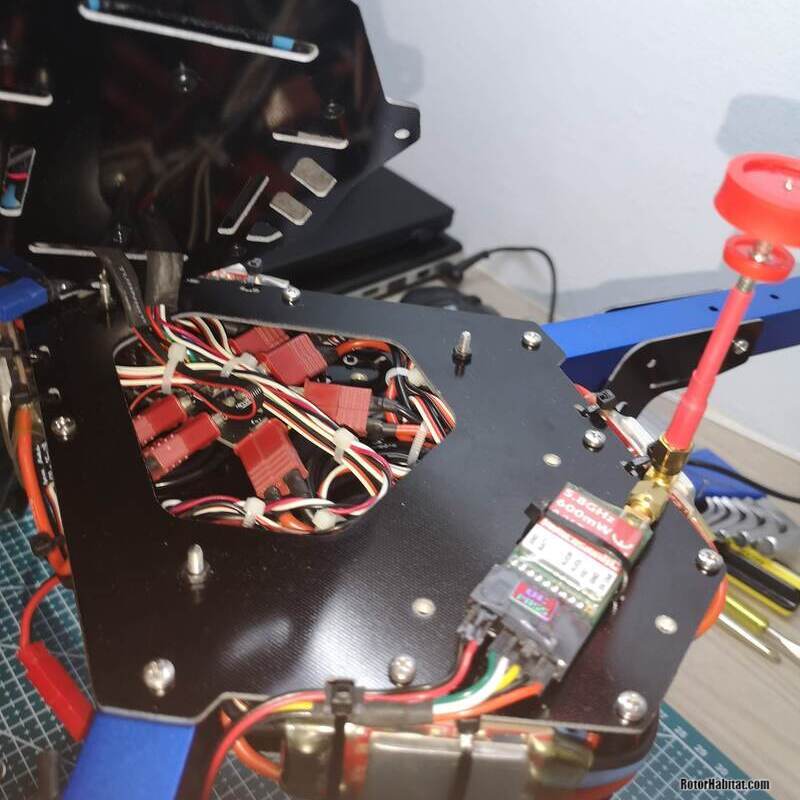
Having two batteries will simplify the wiring & involve less soldering work. This is because a single battery setup will require a voltage regulator (step-down) for the gimbal as it could not be powered directly from the 4S battery.
However, I decided in the end to use a single battery setup as it will reduce weight for longer flight time and it is faster in setting up the Y6 for flight (managing & connecting just one battery instead of two).

Autopilot Firmware
When using a Pixhawk Flight Controller, you have the option to use Arducopter or PX4 firmware. Both firmwares are very well developed (Arducopter is more mature compared to PX4), both have the capability for autonomous flight and mission planning. For me, I have chosen to upload Arducopter Firmware to the 3DR Y6 as I am more comfortable and familiar with the interface and configurations of Arducopter. Mission Planner will be my preferred choice to setup/configure the multirotor and as a Ground Control Station (GCS). It is also possible to use QGroundControl GCS. However, as I have mentioned above, it is down to personal preference.
Closing Comments & Thoughts
Moving back in time to 2014, the 3DR Y6 would be a state-of-art piece of equipment; capable of autonomous flight and stabilised HD video recording. However, technology and trend has catch-up since, how does this 2.6 kg (AWU: All-Weight-Up) beast fare against current drones?
Off-the-shelf drones from DJI are performing the same feat as the 3DR Y6 but with longer flight time (~28mins), 4K video recording and weighting less than 250 grams!
In conclusion, this project serves more as a showcase and a chance for me to have the nostalgia effect of the “good old days”.
However, It is a good time to move on and embrace the latest and best of what this hobby can offer!

