In this guide, we are going to talk about the 4-in-1 Multi Protocol Module: iRangeX IRX4. Firstly, let’s touch on some history and background information of MULTI-Module project. We will then walk through the setup of the module to your radio, and finally how to update the module’s firmware.
So what is a MULTI-Module?
In the not so distant past, each radio manufacturer will have their own proprietary protocols. And in order to operate it with your RC models, you will have to use the same radio and receivers from the manufacturer.
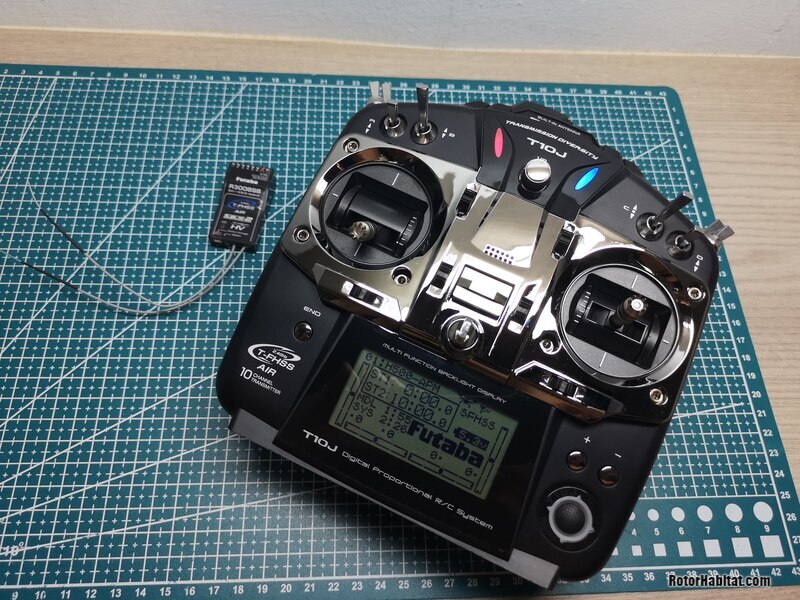
Then came the Multi Protocol Module that can be installed at the back of a compatible OpenTX radio. It allows you to technically control all (almost) types of radio control model available in the market with a single radio transmitter.
There are also radios that have an internal Multi module that allows you to have the same capability out of the box. Examples of such radios are those from Radiomaster or Jumper.
Some Background Information
The Multi Protocol Module started out as a DIY project where people can built circuit boards and flash the open-sourced firmware. Soon with increased popularity, RC hardware manufacturers started making off-the-shelf modules such as the iRangeX IRX4.
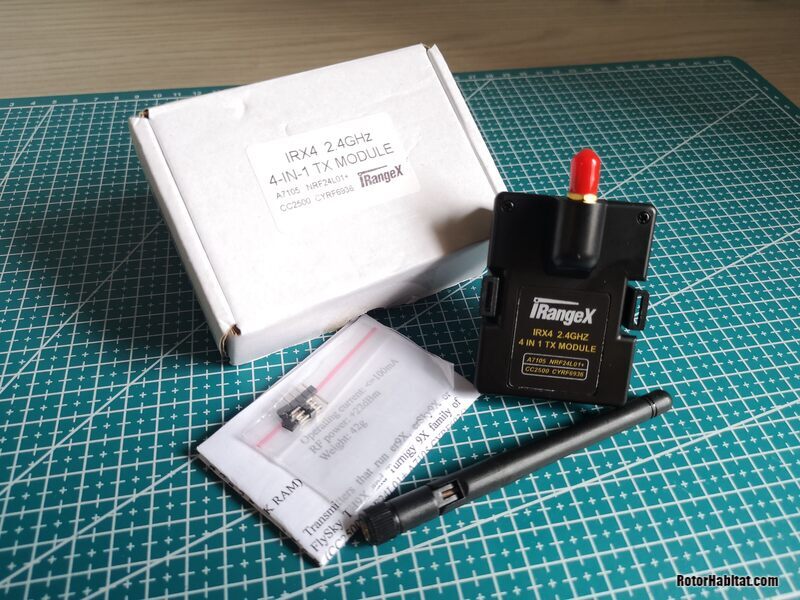
Why is it called a 4-in-1 Module? It is because the module consists of 4 commonly used 2.4GHz RF chips. Texas Instrument CC2500, Nordic NRF24L01, Cypress CYRF6936, and the Amiccom A7105:
- Texas Instrument CC2500: Futaba SFHSS, Frsky
- Cypress CYRF6936: DSM/DSMX, Walkera Devo, J6Pro
- Amiccom A7105: FlySky, Hubsan
- Nordic NRF24L01: HiSky, Syma, ASSAN, and most other Chinese models
Some internal Multi Protocol Modules only have a single RF chip, commonly with a single CC2500. In this case, you will only be able to bind with receivers from Futaba (SFHSS), Frsky, Corona, HITEC, etc.
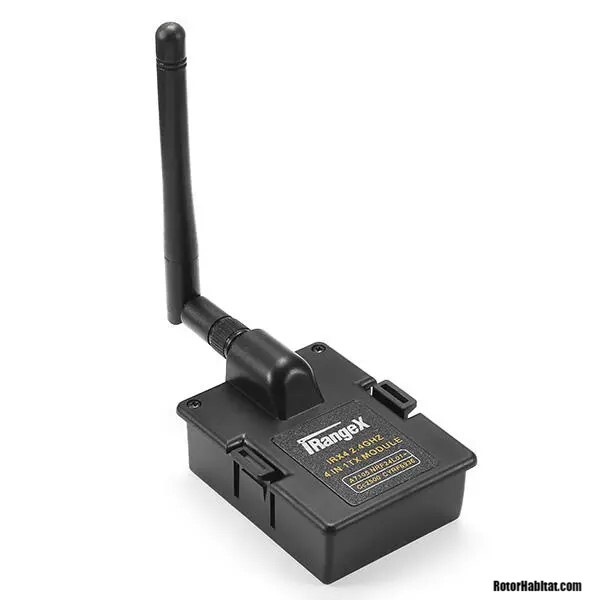
There are two types of 4-in-1 Multi Module from iRangeX, the IRX4 & IRX4 PLUS. The IRX4 plus version can operate in PPM mode or serial mode while the normal IRX4 only operates in serial mode. You will need to use the PPM mode if you are not using a OpenTX/er9X/erSky9X radio. Generally any older radios with a JR external module bay might be compatible with the IRX4 Plus in PPM mode.
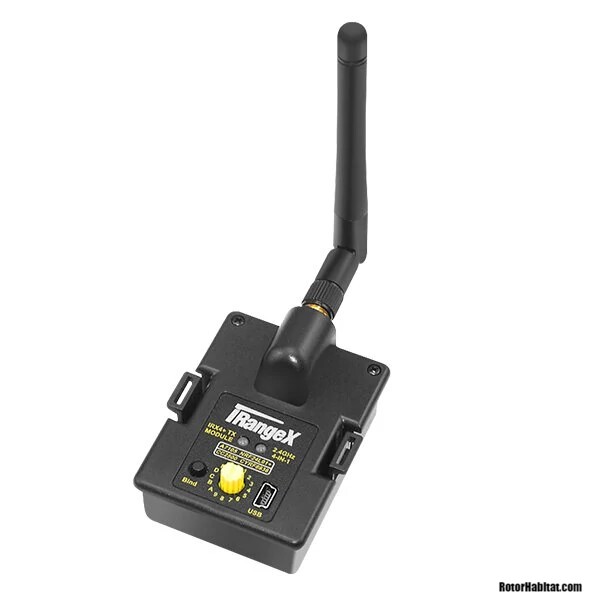
Setting Up The iRangeX IRX4
The setup will be generally the same for all MULTI-Modules, only slightly different if you have an internal MULTI-Module inside your radio. You will not need to install it to the eternal bay (of course!)
I will be assuming that you are using an OpenTX radio capable of serial communication with a MULTI-Module. It is also recommended to use a MULTI-Module in Serial Mode to take full advantage of all features.
Here is a list of radios currently capable of serial communication with a MULTI-Module, some of which are built-in (a.k.a Internal Module):
- FrSky Taranis X9D, X9D+, X9D+ 2019, 9XE, Q X7, Q X7S, QX7 ACCESS, X-Lite Series
- FrSky Horus X10, X10S
- FlySky TH9X
- Turnigy 9X Series
- Jumper T12 (Int. or Ext. Module), T16 (Int. or Ext. Module), T18 (Int. Module)
- RadioMaster TX16S (Int.Module)
Having the latest OpenTX firmware is highly recommended. This ensures you are getting updates of known bugs or new features. Multi-Module option is included by default on all firmware versions 2.3.0 or later.
Installing the External MULTI-Module
If you are using an external MULTI-Module, you have to first install it to the external JR bay at the back of your radio. Ensure your radio is powered off during this step. Most radios will have a bay cover, so remove it before installing your MULTI-Module.
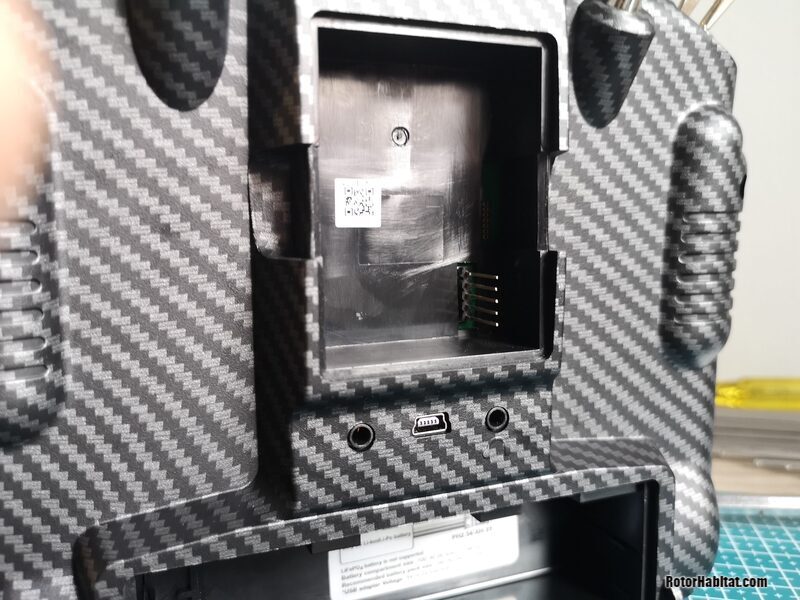
The MULTI-Module connected via five 2.54mm header pins in the JR bay, these pins can be damaged/bended easily. Therefore, ensure you align the pins correctly when installing the module. You do not need a lot of force to insert the module fully into the bay, as it should slide into position. The module should snap in place once fully inserted.
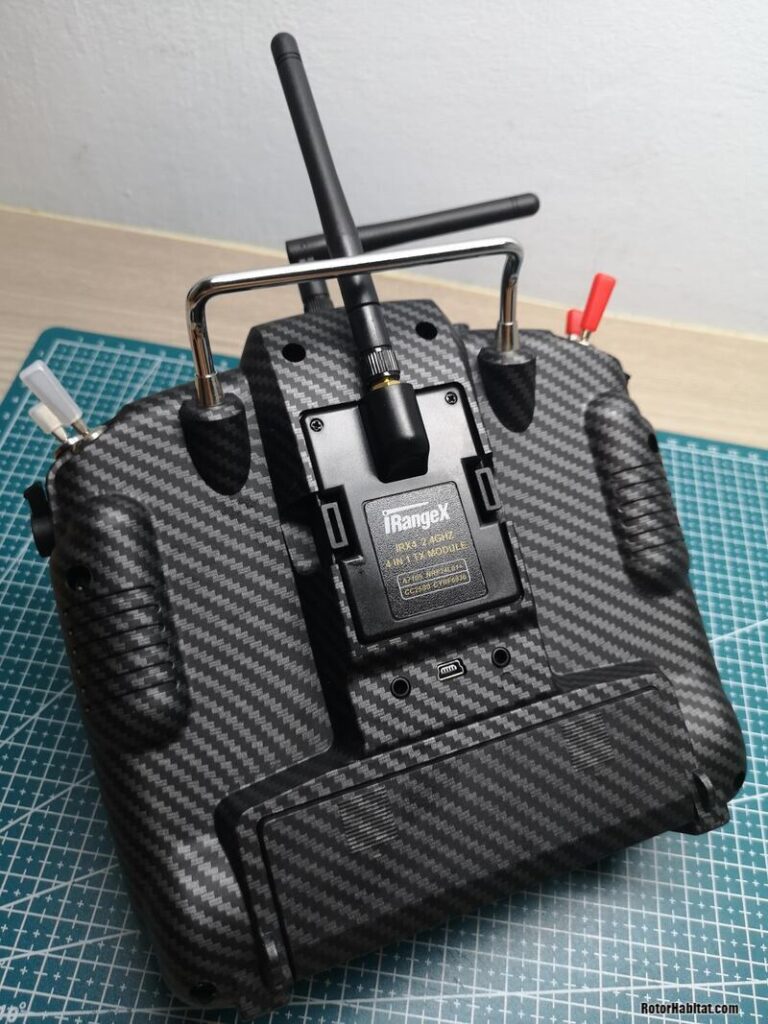
See my review and thoughts of the Frsky Taranis X9D+ 2019 SE
Configuration in OpenTX
Once you have installed your External MULTI-Module, you will need to configure it on your radio. First, select or create a new model you wish to bind to your MULTI-Module. Next, go to the MODEL SETUP page and scroll down till you see Internal RF & External RF.
If your radio has an internal MULTI-Module, you will find MULTI in Mode under the Internal RF. For an external MULTI-Module, select MULTI in Mode under the External RF. Ensure you OFF the Internal RF when using an external module.
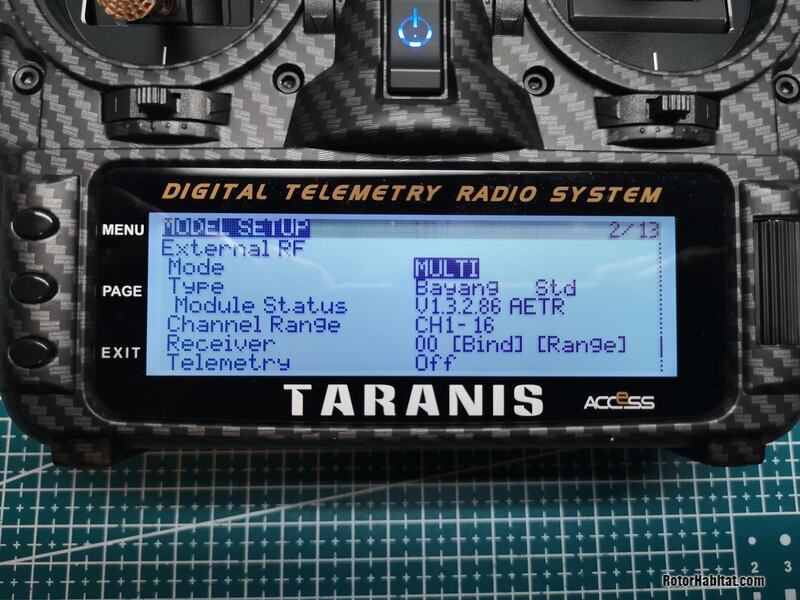
At this stage, if all steps are done right. The MULTI-Module will power up and display the different protocol options and firmware version. If this doesn’t happen, check if you install your module correctly.
Protocols & Binding Options
In general, all the protocols supported by the MULTI-Module should work the same way as it does on their original equipment. Newly added protocols might have bugs that need feedback and resolve in later versions of the firmware. Check out all latest supported protocols from the MULTI-Module Project HERE.
Scrolling to Type in the menu, you get to select the protocol and its sub-protocol. Take note that not all protocols will have sub-protocols.
In this example, selecting FrskyX will have the following sub-protocol:
- D16 – 16 / 8 Channels
- LBT – 16 / 8 Channels
In OpenTX, some older Frsky protocols (D8 & V) are grouped as sub-protocols of FrskyX.
Different protocols will allow you enable or disable different options and functionality, these are some common ones:
- Telemetry: (On/Off)
- Auto Binding / Manual Binding: Auto binding protocols are for models that will initiate binding every time on power up. This is typically used for toy models.
- Bind on Channel: Allows you to assign a radio switch to a channel (default CH16) to initiate binding. When enabled, the radio will not automatically bind at power on (Auto Binding Protocol). Binding must be manually initiated via the assigned switch.
- Receiver Number.: Enables receiver match function for some protocols (e.g Frsky D16). This prevents accidental operation of the wrong model with the same receivers/protocol and bound to the same radio.
- RF Fine Tuning: Some protocols such as Frsky or Futaba will require this. Due to RF hardware variations in each MULTI-Modules. Tuning is required to ensure the proper connection between radio and receiver.
Updating the Firmware
The MULTI-Module (both internal and external modules) uses a different firmware from the radio. The firmware can be flash directly to the module from the radio using OpenTX if the MULTI-Module bootloader is installed (v1.2.1.85 or newer).
If you are using an old version of the MUlTI-Module and can’t update directly from your OpenTX radio. You will need to use other methods; using Flash Multi or using the Arduino IDE to compile the firmware from source and flash it. I won’t touch on the other methods here, but you can find details of these over HERE.
It is very simple to update serial based MULTI-Module directly from OpenTX, first download the latest pre-compiled version of the MULTI-Module from the official website. I will be using a Taranis X9D+ together with an iRangeX IRX4 for this guide.
Click here to Select & Download the firmware
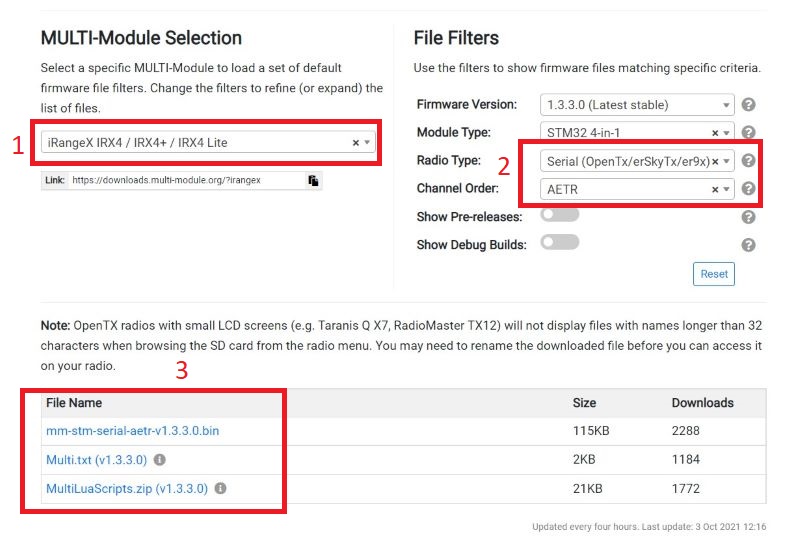
- Select your hardware type, for this case: iRangeX IRX4 / IRX4 + / IRX4 Lite
- Once the hardware is selected, the module type will be populated automatically. You have to select your radio type: Serial (OpenTX) or PPM and Channel order: Eg. AETR
- Once all options are chosen, download all files listed.
The firmware of the MULTI-Module will be the .bin file and LUA scripts tools are contained in the .zip file. You will only need the .txt file if you are using erSkyTX radios.
Flashing the Firmware
To flash the firmware (.bin) to your MULTI-Module, first copy the .bin file to your FIRMWARE folder of the SD card. I will recommend removing the SD card from your radio and access it from a card reader for faster transfer speed. Ensure that the file name is less than 32 characters by renaming it, if not it might not be accessible on some radios with small screens (e.g. Taranis Q X7 or RadioMaster TX12).
You might also want to copy all the LUA script tools you have downloaded. Unzip all the contents and copy all files to: SD Card–>Scripts–>Tools
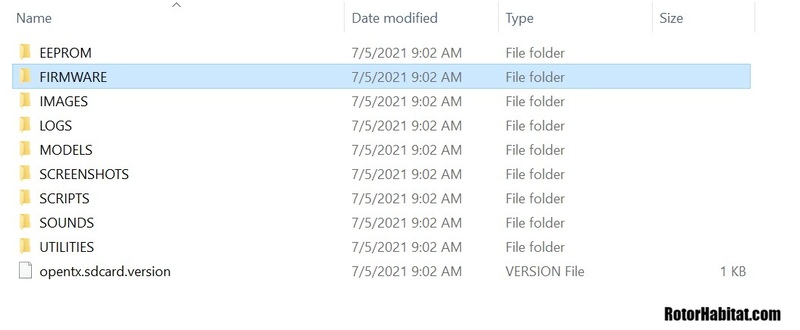
Once this is completed, re-insert the SD card and power up the radio. Access your SD card from the OpenTX Radio.
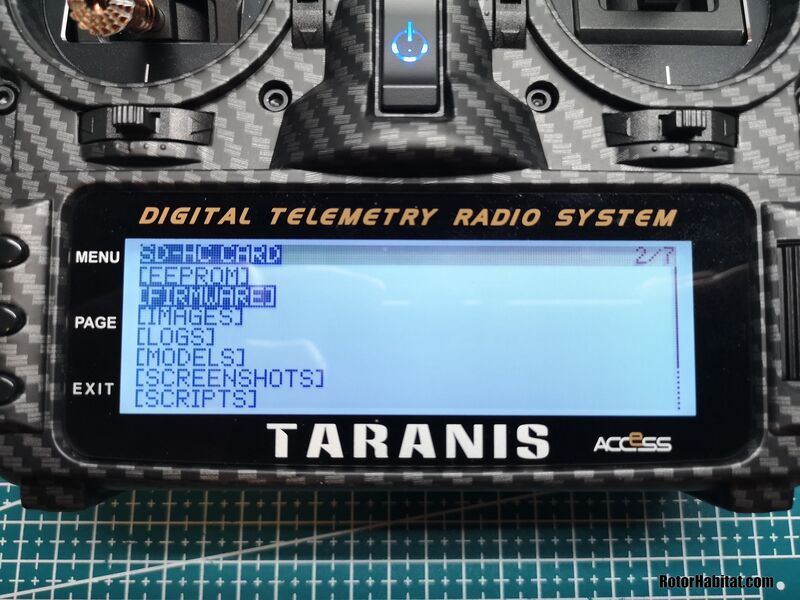
Long press the Menu Button to enter System Menu. Press Page until you are on the SD card page, select FIRMWARE and press Enter. This will be where the firmware file is located which you have copied to earlier.
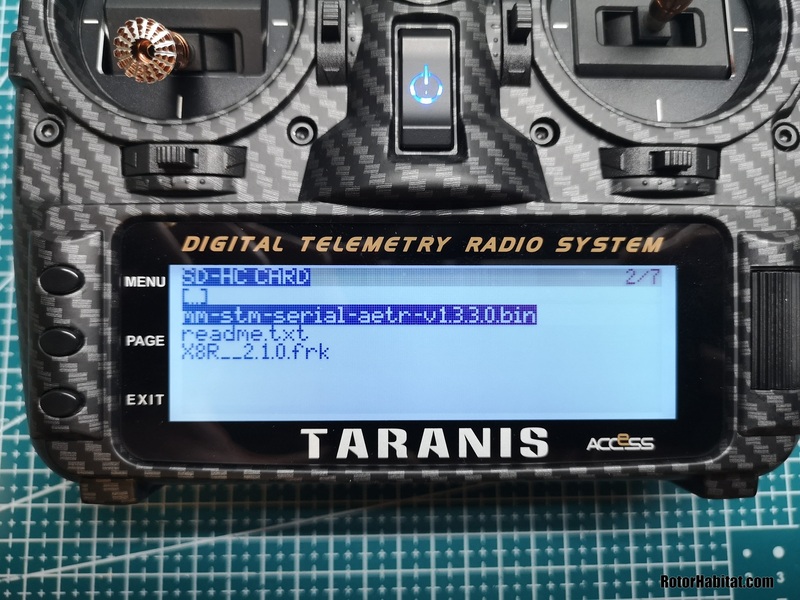
Next long press the firmware file and select Flash External Module.
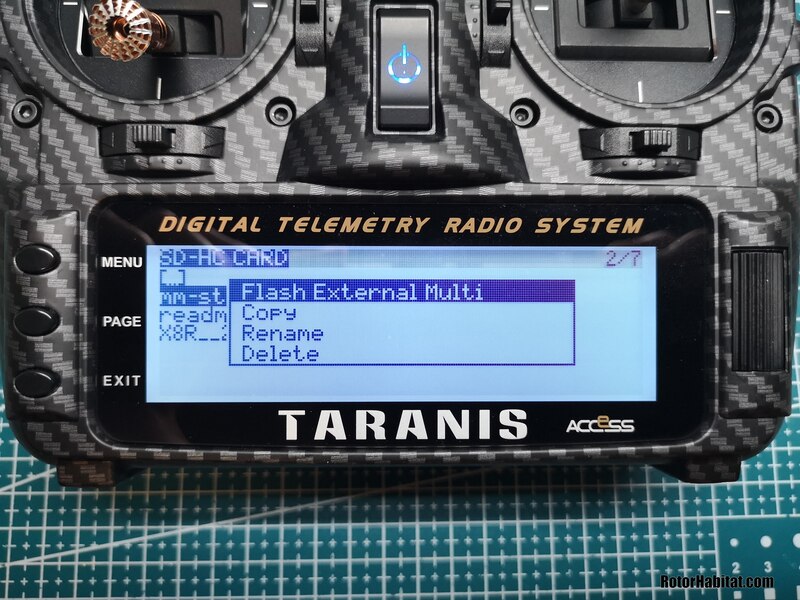
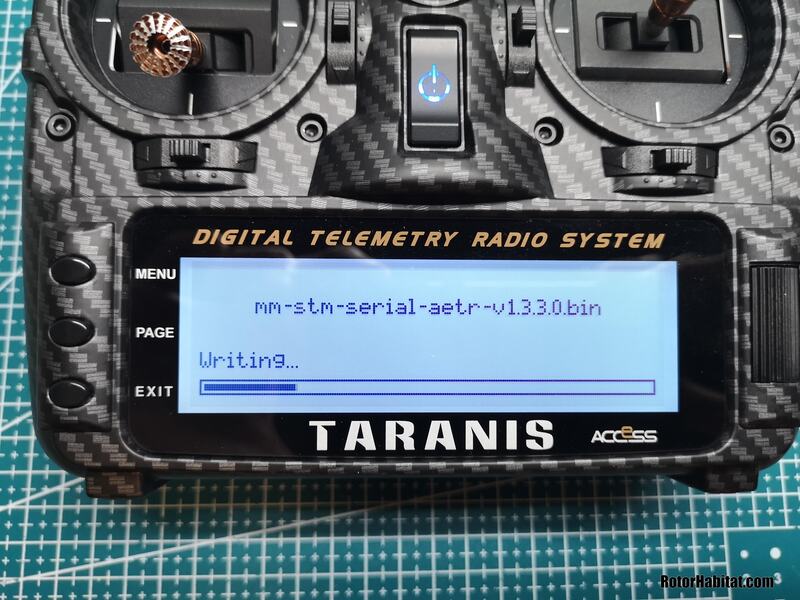
The flashing process will begin and the progress will be indicated on the bar. It should take a couple of minutes.
You will see a successful message once the firmware update is completed. Power cycle your radio and you should see the latest MULTI-Module firmware version reflected on the Module Status in the RF menu (See above).
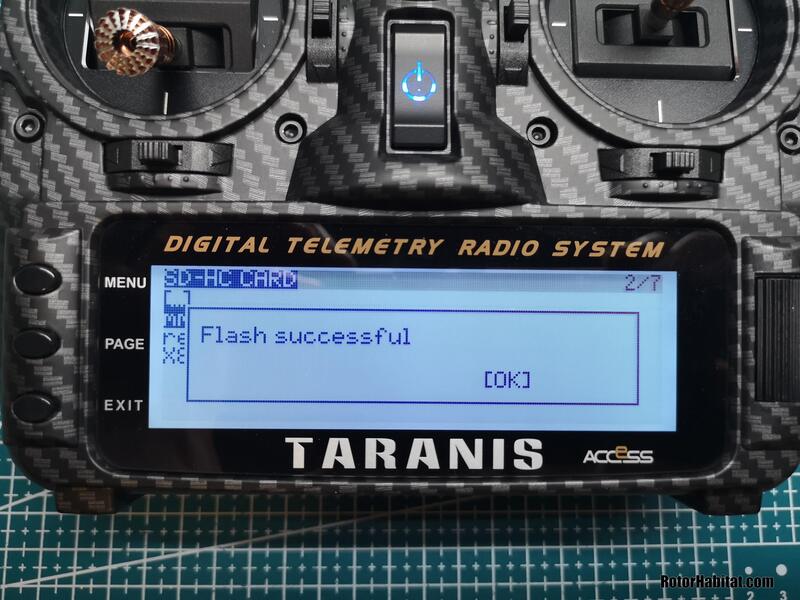
That’s it! You have successfully updated your MULTI-Module. Happy Flying!

